KNK Maxx 24" Vinyl Cutter Available
Back to Equipment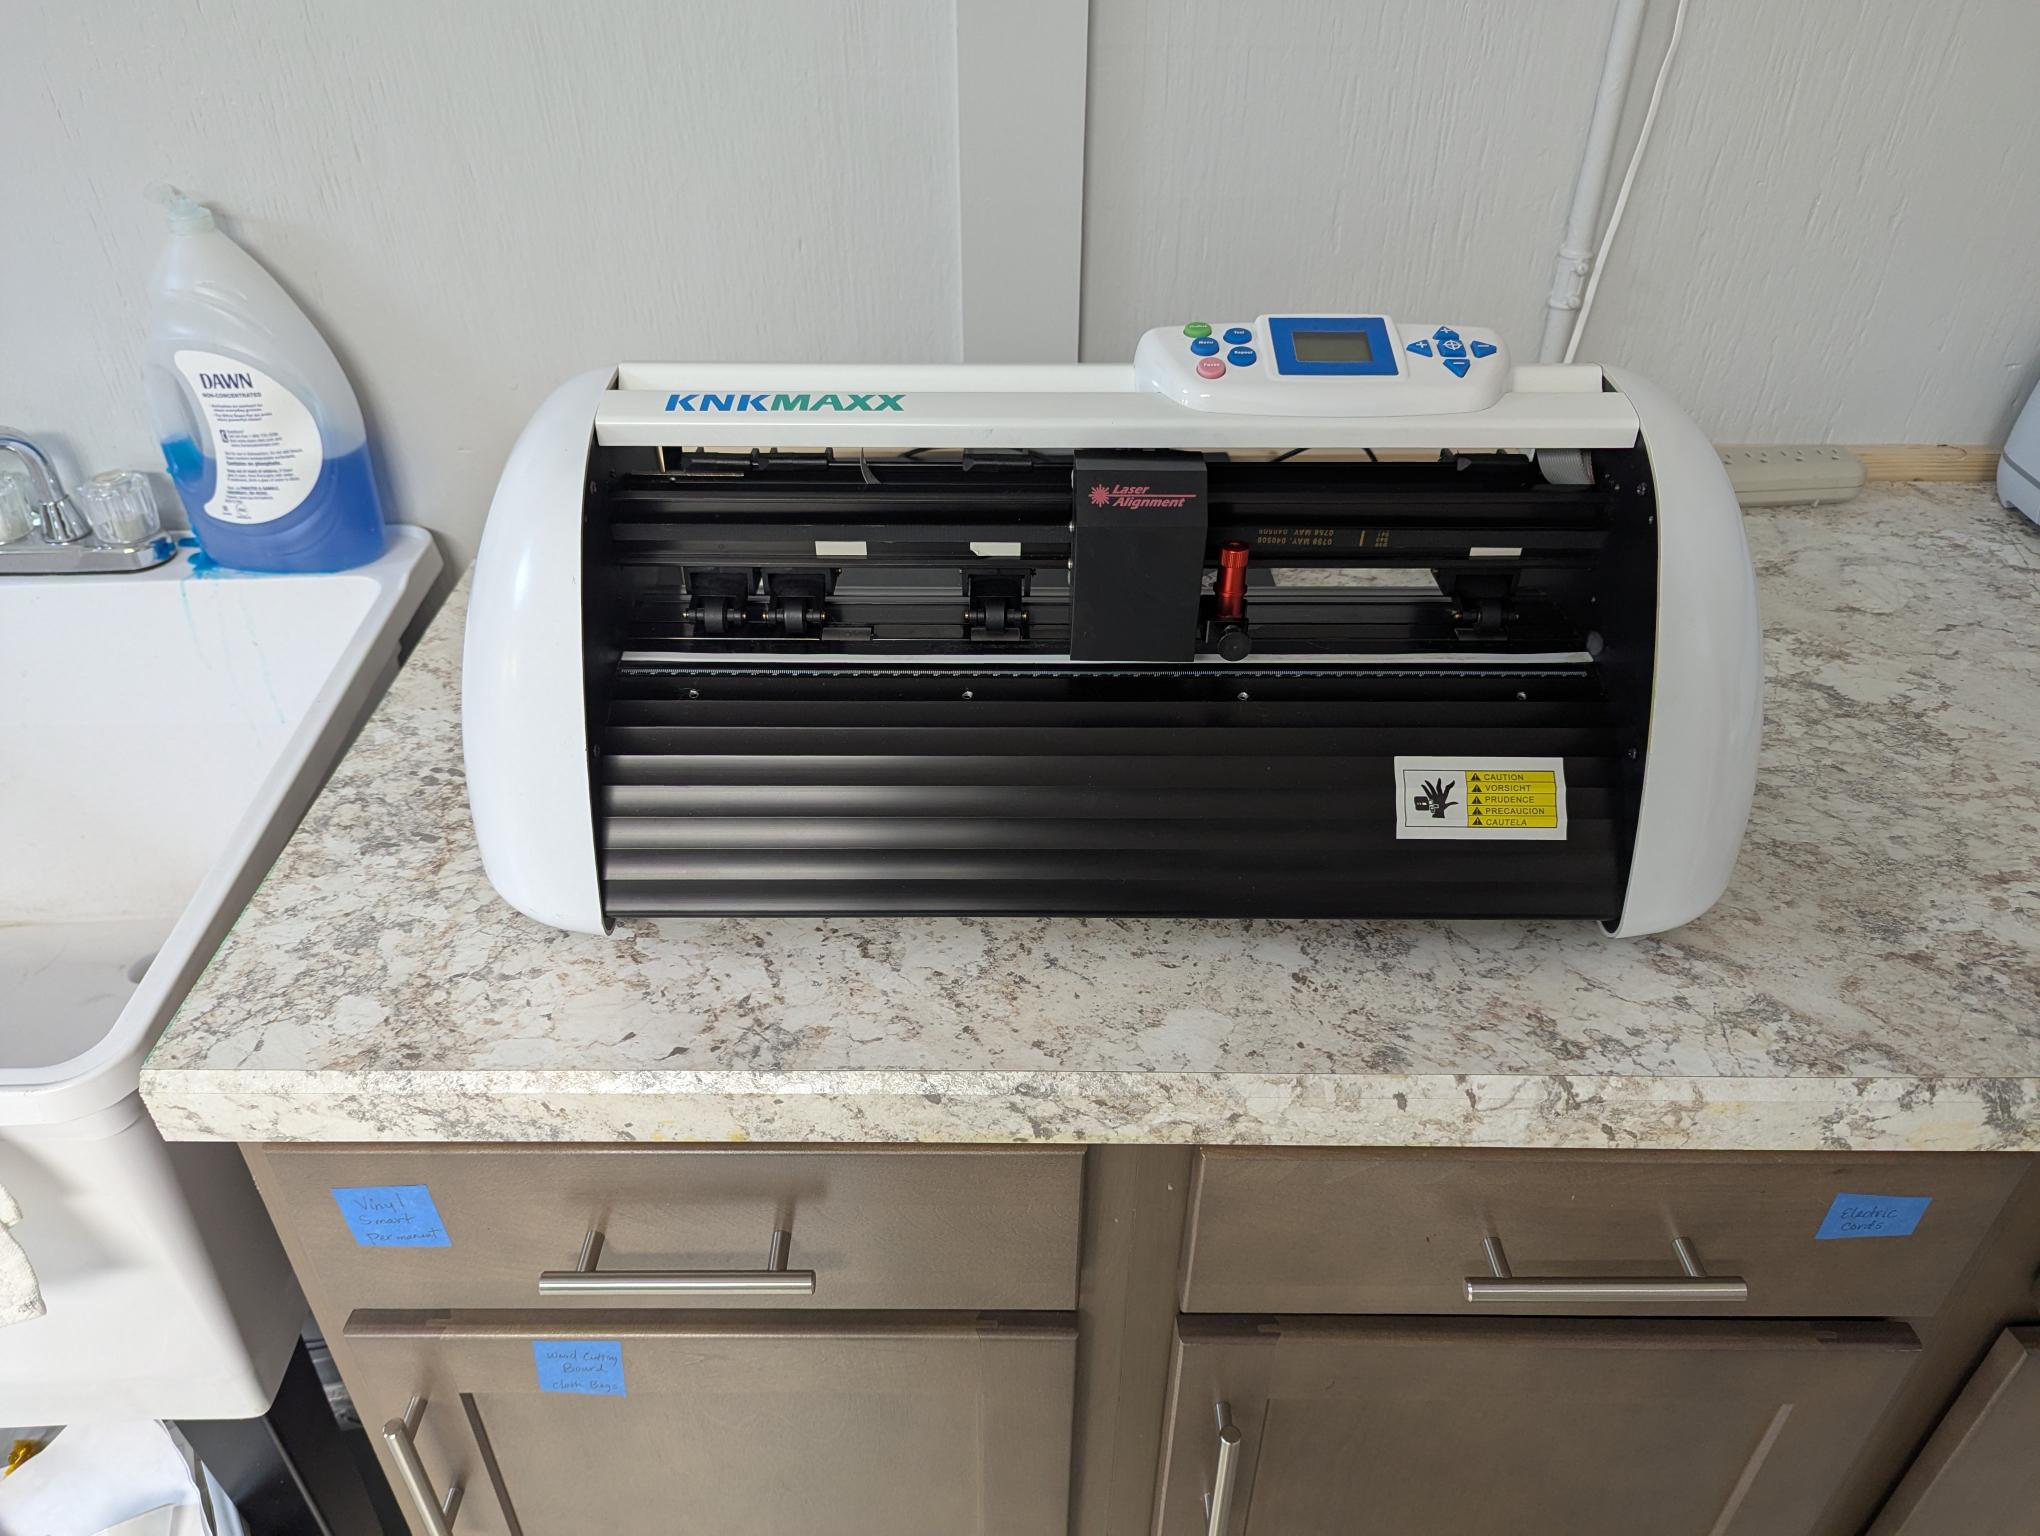
The KNK Maxx is a professional-grade digital die cutter manufactured by Klic-N-Kut (Accugraphic Sales, Inc.), a US-based company specializing in high-quality cutting machines. Built almost entirely of metal, the Maxx is designed for durability and daily use in production and craft environments. With over 950 grams of cutting force and a 24-inch maximum cutting width, the Maxx handles a wide range of materials from delicate tissue paper to dense chipboard and 0.02-inch styrene. The built-in laser alignment system enables accurate print-and-cut registration for projects requiring precise placement around printed designs. The fully adjustable blade holder seat accepts the included blades as well as pens, markers, embossing styluses, and optional accessories such as punch tools, engraving tools, and fabric blades. Roll-fed materials like vinyl and HTV can be cut to unlimited lengths without a mat. This model has been discontinued by the manufacturer but remains fully functional. It connects to a Windows PC via USB and is operated through compatible design software.
- Place the KNK Maxx on a stable, level surface. Attach the bolt-on flatbed tables if not already installed.
- Connect the USB cable from the Maxx to the Windows PC. Ensure drivers are installed.
- Plug in the power cord and turn on the machine using the power switch on the right side.
- Load your material: For sheet materials, place them on the cutting mat and feed the mat under the pinch rollers. For rolled vinyl or HTV, feed the material directly under the rollers without a mat. Ensure at least two pinch wheels grip the material edges.
- Adjust the pinch wheel positions so they sit over the grit rollers and firmly hold the material.
- Insert the appropriate blade or tool into the blade holder. For standard vinyl use the regular blade; for thicker materials use the thick materials blade.
- Adjust the blade tip extension so only enough blade protrudes to cut through the material without cutting the mat backing.
- Open your design software (KNK Studio, Make The Cut, or SCAL) on the connected PC.
- Create or import your design. Supported file formats include SVG and DXF.
- Set the cutting speed and pressure appropriate for your material. Start with recommended test settings and adjust as needed.
- Use the arrow keys on the machine's control panel to position the blade holder at your desired starting point (origin).
- For print-and-cut projects, use the laser alignment light to register your printed material with the design.
- Send the cut job from the software. The machine will begin cutting.
- When the cut is complete, use the control panel to return the carriage to the origin or move it out of the way.
- Carefully remove the material or mat from the machine. Weed excess material as needed.
- When finished, power off the machine and retract or cover the blade to protect it.
No certification required
Book This Equipment