Sienci Labs AltMill 4x4 CNC Router Available Cert Required
Back to Equipment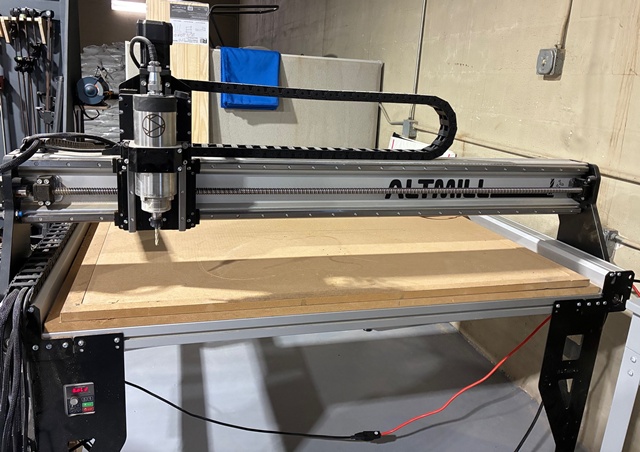
The Sienci Labs AltMill 4x4 is a high-performance CNC router that brings industrial-level technologies to a prosumer price point. Built on a rigid aluminum frame with HGR15 linear guides and ball screws on all axes, the AltMill delivers exceptional precision and rigidity for both hobby and production-level work. The machine features closed-loop NEMA 23 stepper motors on all three axes, which auto-correct positioning and auto-stop when unexpected resistance is encountered, preventing crashes and ruined workpieces. Cutting speeds reach approximately 600 inches per minute with 10,000 mm/min rapids. This AltMill is equipped with a Sienci 1.5kW 80mm air-cooled spindle running up to 24,000 RPM with ER16 collets. The spindle is controlled via a VFD (variable frequency drive) unit, allowing automated speed control and quieter operation compared to trim routers. The machine cuts a wide range of materials including hardwoods, softwoods, MDF, plywood, plastics, acrylic, foams, composites, and aluminum. With proper tooling and feeds/speeds, even steel can be machined. The working area is approximately 49 by 49 inches with a Z-axis travel of approximately 6.8 inches. The AltMill is controlled using gSender, Sienci Labs' free CNC control software, running on the adjacent computer. Designs are created and toolpaths generated using VCarve CAM software. Reservation is required before use.
- Reservation is required before using the CNC router. Check the reservation system for available time slots.
- Ensure the work area is clean and free of debris. Inspect the wasteboard for excessive wear.
- Power on the machine by turning on the 48V power supply and the spindle VFD unit.
- Turn on the computer and launch gSender. Connect to the AltMill via USB.
- Home the machine using gSender. The inductive sensors will establish the machine's reference position.
- Select and install the appropriate end mill or bit into the ER16 collet. Tighten securely using the provided wrenches.
- Secure your workpiece to the wasteboard using clamps, screws, or double-sided tape as appropriate for the material and operation.
- In gSender, jog the spindle to your desired X-Y zero position on the workpiece. Set the X and Y zero.
- Set the Z zero using the touch plate or by manually jogging the bit down to the material surface.
- Open VCarve on the workstation. Create or open your design and generate toolpaths with appropriate feeds, speeds, and depth settings for your material.
- Export the toolpath as a G-code file and load it into gSender.
- Verify the toolpath by reviewing the preview in gSender. Ensure the cutting area is within bounds.
- Attach the dust collection hose to the dust shoe if not already connected.
- Start the spindle through gSender (VFD control) or manually set the RPM on the VFD.
- Run the G-code program from gSender. Stay near the machine and monitor the cut. The emergency stop is available if needed.
- When the program completes, the spindle will stop automatically if VFD control is configured. Otherwise, stop the spindle manually.
- Remove your workpiece and clean up all chips and dust. Vacuum the wasteboard and surrounding area.
- Return any tooling to its proper storage location. Power down the machine and VFD when finished.
- CNC Routing Certification (Category)