Epson WF-7710 Sublimation Printer Available Cert Required
Back to Equipment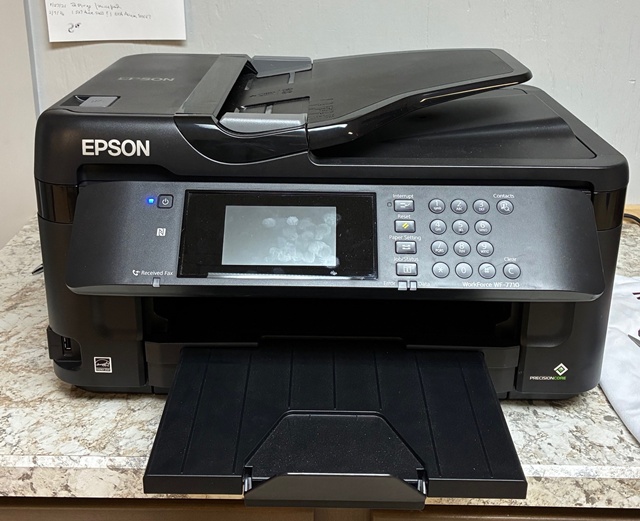
The Epson WorkForce WF-7710 is a wide-format all-in-one printer that has been permanently converted to sublimation printing with dedicated sublimation inks. This printer is NOT a general-purpose inkjet printer — it is shared equipment configured exclusively for sublimation transfers and requires extra care. Sublimation printing uses special inks that turn into gas when heated and permanently bond with compatible materials. The printer produces mirror-image transfers on sublimation paper, which are then heat pressed onto polyester fabrics (light colors only) or polymer-coated blanks such as mugs, tumblers, metal panels, phone cases, coasters, and more. Once sublimated, images are permanent and cannot be removed or corrected. The WF-7710 is powered by Epson's PrecisionCore printhead technology and prints borderless transfers up to 13 by 19 inches, accommodating large-format sublimation projects. The 4.3-inch color touchscreen provides easy navigation for print settings. Designs should be created in RGB color mode, and images must be mirrored before printing for textile transfers. Colors may appear dull on the sublimation paper but will brighten after heat pressing. White areas in designs are produced by the blank material itself, not by ink. Exact color matching is not guaranteed and results vary by blank manufacturer and coating quality.
- Ensure you have completed sublimation printer certification before use.
- Design your artwork on the computer. Use RGB color mode. Mirror your image if printing for textile transfer. Set the artwork to the exact desired size — do not plan to scale later.
- Load sublimation paper into the rear specialty feed tray. Ensure the printable (bright white) side faces correctly. Do NOT use regular inkjet paper.
- Select the sublimation printer preset in the print dialog. Verify paper size and quality settings.
- Print a test on sublimation paper if you are unsure of color or placement.
- Allow the printed transfer to dry. Do not touch the printed surface — oils from skin can affect the transfer.
- Prepare the appropriate heat press (flat press for shirts, panels, etc. or mug press for drinkware). Preheat to the correct temperature for your blank.
- Position the sublimation transfer face down onto your blank. Secure with heat-resistant tape if needed to prevent movement.
- Press at the correct temperature, time, and pressure for your specific blank. Ask staff if unsure of settings.
- Carefully remove the item from the press. Use heat-resistant gloves — items will be very hot.
- Peel the sublimation paper while hot (for most blanks). Be aware of hot vapor when removing paper.
- Allow the item to cool completely before handling.
- Clean up paper scraps, waste, and the work area when finished.
- If you experience any printer errors, paper jams, or unusual behavior, do not attempt to fix it yourself. Report to staff immediately.
Common Mistakes to Avoid: Printing on the wrong side of sublimation paper, forgetting to mirror artwork, using cotton or dark fabrics, moving the transfer during pressing (causes ghosting), touching the print before pressing.
- Crafting Tools Certification (Category)